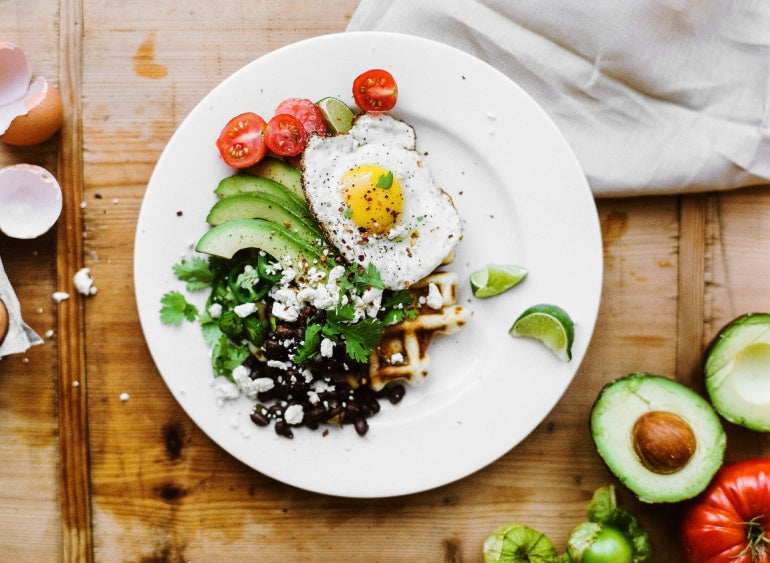
How to Create Mouth-Watering Food Photography
A guest blog by photographer Constance Mariena.

Food, gatherings, and storytelling have always been such meaningful aspects of my life. Growing up, the dinner table was the pinnacle of everything in our home. It was this sacred space to sit, relax, laugh, and simply enjoy each other—almost as if everything else in life merely existed in order to make that part of the day possible.
Breaking bread together is one of the most impactful community-building experiences, transcending generational gaps, cultural differences, religion, race, political strife, etc.
I believe that the stories told around the table, the stories of the people at the table, and the stories of the people who help to create that experience are of utmost importance.
So, I'm sharing five tips to help you effectively tell and celebrate the stories of all involved in this process, whether it's for a commercial film photography shoot or digital photography around your table at home.

1. KEEP THE STYLING SIMPLE
It’s very easy to over-style an image. Remember that props (dishes, flatware, textiles, etc.) exist to support and complement your subject matter, not to compete or overshadow.
Make sure that the composition makes sense. Ask yourself why you’re using the props that you are. Are they appropriate for the story you’re telling? Are they superfluous?
Make sure to only include props that are necessary in telling your story. For example, if you’re baking something that doesn’t require a rolling pin, don’t include one in the image.
Spend time familiarizing yourself with which knives are used for what purposes, which utensils go with which course, which wine glasses are used for Chardonnay versus Merlot, etc.

More often than not, solid and neutral colors are the best options. In most cases, I tend to avoid graphic, patterned, neon, or bright colors. That being said, I don’t avoid color all together.
Subtle complimentary colors can help to accentuate your subject matter. For example, if your dish is a yellow pasta, a light blue table cloth can help to highlight your main subject.
2. UNDERSTAND THE FOOD
If you’re working with a chef, you’ll most likely not need to alter much, as they’ve typically spent hours figuring out how to plate and display their masterpieces in a way that best represents their hard work.
If you’re not working with a chef, be sure to familiarize yourself with the dish as much as possible prior to shooting. Know it well, and create it a couple of times before capturing it.
You’ll come to find that some proteins look better when they’re a bit undercooked. Some desserts will hold better if they’re frozen prior to shooting. Embrace the trial and error model here, and you’ll surely thank yourself!
Additionally, small portions are your best friend here. They’re more visually appealing and much easier for the viewer to process.

3. SHOOT QUICKLY
The goal is that everything in your shot appears fresh and appealing, and different foods have different shelf lives.
Are there tricks to make everything last longer? Of course! However, I’ve found that nothing really beats a freshly plated dish.
For example, produce starts to lose its vibrant hues, items meant to be served chilled or frozen start to sweat, food that has a natural glisten starts to look dry, drinks that foam (beer and champagne) start to look flat.

While you can always whip out coconut spray to add glisten or a dash of salt to bring back the life to your glass of champagne, I believe the best trick you can have up your sleeve is experience.
Experience always brings with it confidence and speed, and those two can be your new best friends when shooting film with subjects with a short life span.
4. SHOW OFF THE BEST ASSETS
When composing the shot, decide what the most important component is and what camera settings and angle are best for capturing that component.
For example, in a citrus salad, grapefruit wedges can play a really beautiful, informative, and photogenic role. Fruit wedges have a natural glisten and shine, so move around your dish to find the light that best accentuates that aspect.
For a medium rare steak, it’s important that you show how the meat is cooked. For a meringue pie, a side view to show the peaks is a must. Is your coffee or soup steaming? Make sure your composition highlights that steam.

5. SHOW THE PROCESS
Process shots add a sense of humanity and draw the viewer in. They also act as a sort of thread that weaves the entire story together. Focus on the farmer and his routine, the chef in her element, and the community that is being built through gathering around the table.

Process shots also allow you to display aspects of the dish that may be better shown in motion while serving or plating.
For example, maple syrup being poured onto waffles, chocolate ganache being spread on a cake, powdered sugar being sprinkled onto pastries, wine being poured, fresh pepper being cracked, etc.

Ready to start taking some delicious shots? Here's a few questions to keep in mind while styling & shooting:
- How is the light highlighting the most important elements of the dish?
- Is the environment complimenting the subject or competing with it?
- Do the props involved make sense for the subject matter?
- What is the best perspective or angle for this dish?
- Does the food look fresh and appetizing?
- Have I created enough contrast for the image?
- Does the styling represent the brands/chefs/makers in the best way possible?
- How can I incorporate the human element into this image?

